
The AstroPhotoCamera is the big challenge. The idea is to eventually have a web site that people can go to, select an object they want to photograph (either by name or co-ordinates) and their email address. This would them get into the Queue, which the computer would use to plan the night’s observing and picture taking. If the object was visible, it would be photographed and the photo stored to be available on the web. An email would be sent to the individual saying their target had been photographed, and provide a link to the image, so they could download a copy.
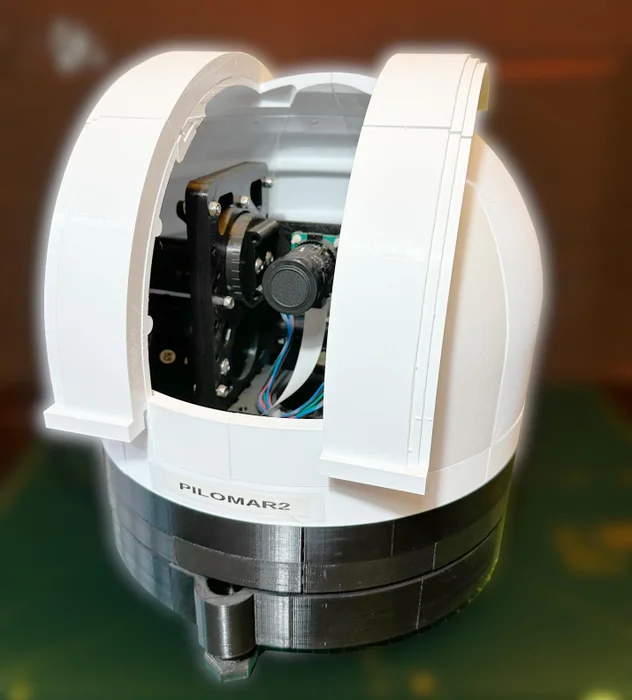
While researching how this might be accomplished, I came across a page on building almost exactly that type of setup (sans the web interface) and it’s a very detailed page.
His GitHub repo has the most recent updates.
He has a fairly extensive parts list that I’m going to update and quantify:
Electronics
- Raspberry Pi 4B. At least 2GB, preferably 4GB.
- 32GB micro SD card.
- Raspberry Pi USB power supply.
- Pimoroni Tiny2040 microcontroller. 8MB Headered version.
- DRV8825 stepper motor driver board (x2).
- 0.9Degree Nema17 stepper motor (eg uk_stepperonline) 17HM19-2004S (x2). (1A motors work fine, but I use 2A motors so that there’s more power available in the future)
- 12V 8A power supply.
- Electronic components
- Wire
- Prototyping board
- 47uF capacitors (x3)
- 660 Ohm resistor
- 10K Ohm resistor
- BC548CTA NPN transistor (or equivalent)
- Weatherproof protection for power and electronics.
Camera
- Raspberry Pi Hi Quality camera sensor.
- Raspberry Pi 16mm telephoto lens.
- 30-40cm camera ribbon cable.
Mechanical
- 6mm and 5mm diameter metal rod.
- 1:60 worm gear set (x2).
- M4 and M5 nuts and bolts 15-30mm.
- M5 and M6 6x19mm skateboard/RC bearings.
- M5 and M6 collars.
- 250mm Lazy Susan bearing.
- M6 flange couplers.
Computing/software
- Raspbian OS (Latest BUSTER full build image).
- Python 3.7 on Raspberry Pi.
- Circuitpython 7.2 on Pimoroni Tiny2040 microcontroller.
- Remote computer (whatever you like) to build, control and process images.
- Download .zip file to install scripts, data and software onto Raspberry Pi and Tiny2040.
- Software to ‘stack’ images. (eg DeepSkyStacker, or others)
- Software to ‘refine’ images. (eg The GIMP, or others)
- Internet access at least for the initial setup.
- Local network (LAN cable or wifi) to operate the telescope remotely.
- An SFTP client on your desktop computer. Filezilla works fine.
- A terminal emulator such as puTTY or RealVNC on your desktop computer.
Printing
- A 3D printer with a 300x300mm print bed. (Smaller is OK if you are prepared to modify some STL files).
- Approximately 2kg of BLACK filament (PLA is enough). Use this for the interior parts to reduce reflections.
- Approximately 2kg of WHITE filament (PLA is enough). Use this for the exterior observatory dome.
Time
- Be prepared to spend some weeks building this. Hopefully the software building is quite fast, but there are a lot of components to 3D print and a few hours of electronics tinkering.
Skills
- Basic 3D printing skills.
- The ability to wire a simple circuit board for the Tiny2040 and DRV8825 chips.
- An interest in astrophotography and astronomy. You will need to learn how to ‘stack’ images to get the best results from Pilomar. Astrophotography image stacking can be fun and creative.
- Some basic Python.
Money
- You will need to buy materials and components for this project. The most expensive single item is probably the Raspberry Pi, maybe you already have one of those!