
3D Printed Working Miniature Observatory Using Raspberry Pi

|

|

|
- Always under development
- Assembly overview
- Supplies
- Step 1: Build the Raspberry Pi
- Step 2: Build the Tiny2040
- Step 3: Test and Focus the Hi Quality Camera
- Step 4: Build the MotorController Board
- Step 5: Test the Motorcontroller Board
- Step 6: Build the Foundation
- Step 7: Build the Platform
- Step 8: Build the Camera Tower
- Step 9: Build the Azimuth Motor and Gearbox
- Step 10: Build the Altitude Motor and Gearbox
- Step 11: Install the Electronics and Camera
- Step 12: Build the Observatory Dome
- Step 13: Using the Pilomar Software
- Step 14: Processing the Images
- Step 15: Summary
Always under development
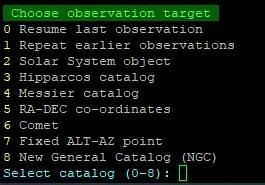
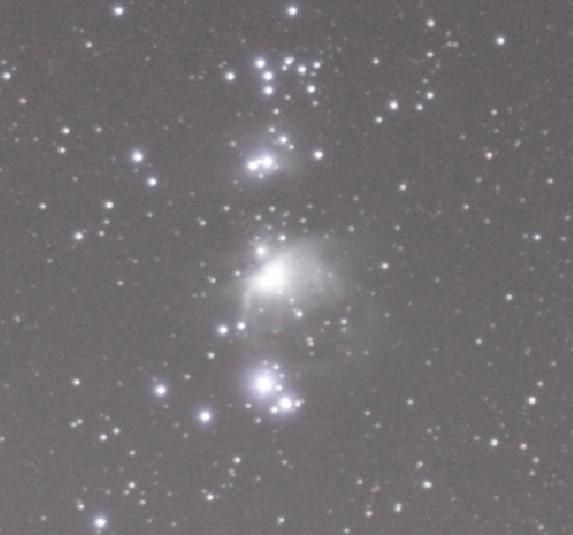
This is a working miniature observatory. It uses a Raspberry Pi computer for the brains, a Raspberry Pi RP2040 based microcontroller to control the movement, and the Raspberry Pi Hi Quality camera as the telescope. The Raspberry Pi operates in ‘headless’ mode, so you can operate it remotely from the comfort of your home if you have a home network. You can select targets from a large database and Pilomar will find and track the target if set up correctly. It will then start taking photographs which you can download and ‘stack’ to create more detailed images.
When Raspberry Pi launched the Hi Quality camera solution in 2020 I wondered if it was possible to use it for astrophotography. What followed was a 2 year hobby project which taught me some basics about stepper motors, microcontrollers, simple electronics, CAD development and more. I shared an image of the first version on Twitter and it drew some interest, now after a couple of winters of using and refining the design… here is an outline of how I made it. I am not an expert in any single element of this, everything can be better, but it works, and if I can make one, so can you!
You may want to build your own, or just use some elements, maybe you can suggest improvements and new ideas. Maybe you can design a different observatory dome for it? I have lots of further development ideas but not enough time to do them all! I would love to hear feedback if you have a go at something like this yourself.
Limitations
I have built and operated this in the UK in the Northern Hemisphere. Mechanically this will work in the Southern Hemisphere too, but I think that the software on the Raspberry Pi will need adjustments to work in the south. It’s possible, but be prepared to dig into the software to iron out problems.
Image quality is NOT going to match expensive telescopes, this is an educational project to see how telescopes work. But it DOES work and can produce some really interesting images.
Safety
You are building a strong mechanical and electrical device that is to be used outside! Get advice from experts if you are unsure of anything here. This design is not weatherproof! Keep it indoors in bad weather and when not in use.
Assembly overview
Although this is mainly a 3D Printing project, I recommend that you start with the software and electronics first. Only start 3D printing the body when you are happy that the software and electronics work as expected. You can prove that the telescope will work electronically BEFORE you invest time and material in the 3D printing. If you do not decide to proceed, you still have the computer to use for other projects. You can practice using the telescope once you have the electronics working – it can simulate everything else.
Electronics
- Build the Raspberry Pi
- Build the Tiny2040
- Test and focus the camera
- Build the motorcontroller board
- Test the motorcontroller board
Telescope
- Build the foundation
- Build the platform
- Build the camera tower
- Build the azimuth motor and gearbox
- Build the altitude motor and gearbox
- Install the electronics and camera
- Build the observatory dome
Using Pi-lomar
- Using the Pi-lomar software
- Processing the images


